How to Develop Color (C-41) Film at Home
This page contains affiliate links. Learn more in our disclaimer.
Developing color film at home is easy. And if you’ve already developed black and white photos at home you probably have almost everything you need to make the jump to C-41 color film processing. The main difference is that with C-41 film, you have to worry about getting the temperature of your chemicals up to 102°F / 39°C. That’s easily solved by using a regular kitchen sous vide.
I should also mention, I’m using this process with the Unicolor C-41 Powder 35mm / 120 Film Home Developer (1 liter) Kit. So for instance, if you’re going to use a 2 liter kit - you’re going to need larger storage containers / beakers for your chemicals than what I have listed here.
Hardware
Before you develop anything at all, you're gonna need a few basic things:
Changing Bag - This is what allows you to load your film into the developing tank without the aid of a darkroom. I use a Patterson Changing Bag that I paid around approximately $30 for online(I've seen other brands for as low as $15).
Developing Tank - There are all sorts of options available out there. Some that hold only a single roll or even 8 rolls of film. Stainless steel or plastic. What I used is the Paterson Universal Tank with 2 reels. This tank holds two rolls of 35mm film or a single roll of 120/220 film. Again this will run about $30.
Reels - In all likelihood, your developing tank will come with the reels. However, I use the Omega Universal Adjustable Multi-format Reel. I've found it's just a bit easier for me to load the film with these. Each one will add about $18 to the budget.
Beakers - These are necessary for measuring out chemicals each time you develop film. I use 4x 1000ml low form graduated glass beakers.
Storage Containers - After you mix all of your chemicals, these are what you're going to be storing them in long term. I use 3 of the 32oz Amber Glass Growlers. Now upon researching this I’ve noticed they only have a 946 ml capacity - as opposed to 1000 ml of chemicals you are mixing. Find a container with an extra 54 ml of capacity if you’d like, but these work fine. You’ll also want to label the containers as you go but a piece of scotch tape if fine.
Thermometer - A 12" Laboratory Thermometer should do the trick. Also another $8 added onto the cost.
Film Clip & Film Squeegee - This is simply to hang your film up to dry and squeegee off the excess water after rinsing it. $20.
Sous-vide - This is what you’re going to use to heat up your water and chemicals during the mixing and developing process. This sous vide is the one I use.
Distilled water- Pick up 2 gallons of the stuff the next time you’re at the grocery store.
Aside from these, you'll need a pair of scissors, a bottle opener and permanent marker.
Mix Chemicals
Before you can develop any film, you have to mix your Developer, Blix & Stabilizer and transfer it to your storage containers. This is where the sous vide first comes into play. You place the beakers full of distilled water into a large enough container filled with tap water. The sous vide attaches to the side and you set the temperature to 102°f . This heats up the tap water which transfers heat to the containers of water. Below is a picture of what it looks like once you get to the point of processing film - but for now the beakers are just filled with distilled water.

Developer
Place 800 ml of distilled water at 110 degrees Fahrenheit into your 1000 ml beaker. While stirring, add the contents of the packet labeled “Developer.” Stir well and add additional distilled water to make 1000 ml. Transfer to storage container using a funnel or just pour extra carefully.
Blix
Place 800 ml of distilled water at 110 degrees Fahrenheit into your 1000 ml beaker. While stirring, add the contens of the packet labeled “Blix A” and follow with the packet labeled “Blix B.” Adding Blix powder to water creates an endothermic reaction as it goes into solution. Again add distilled water to make 1000 ml and transfer to storage container.
Stabilizer
Add contents of packet marked “Stabilizer” to 1000 ml of distilled water and mix thoroughly. This is done at room temperature.
Process Film
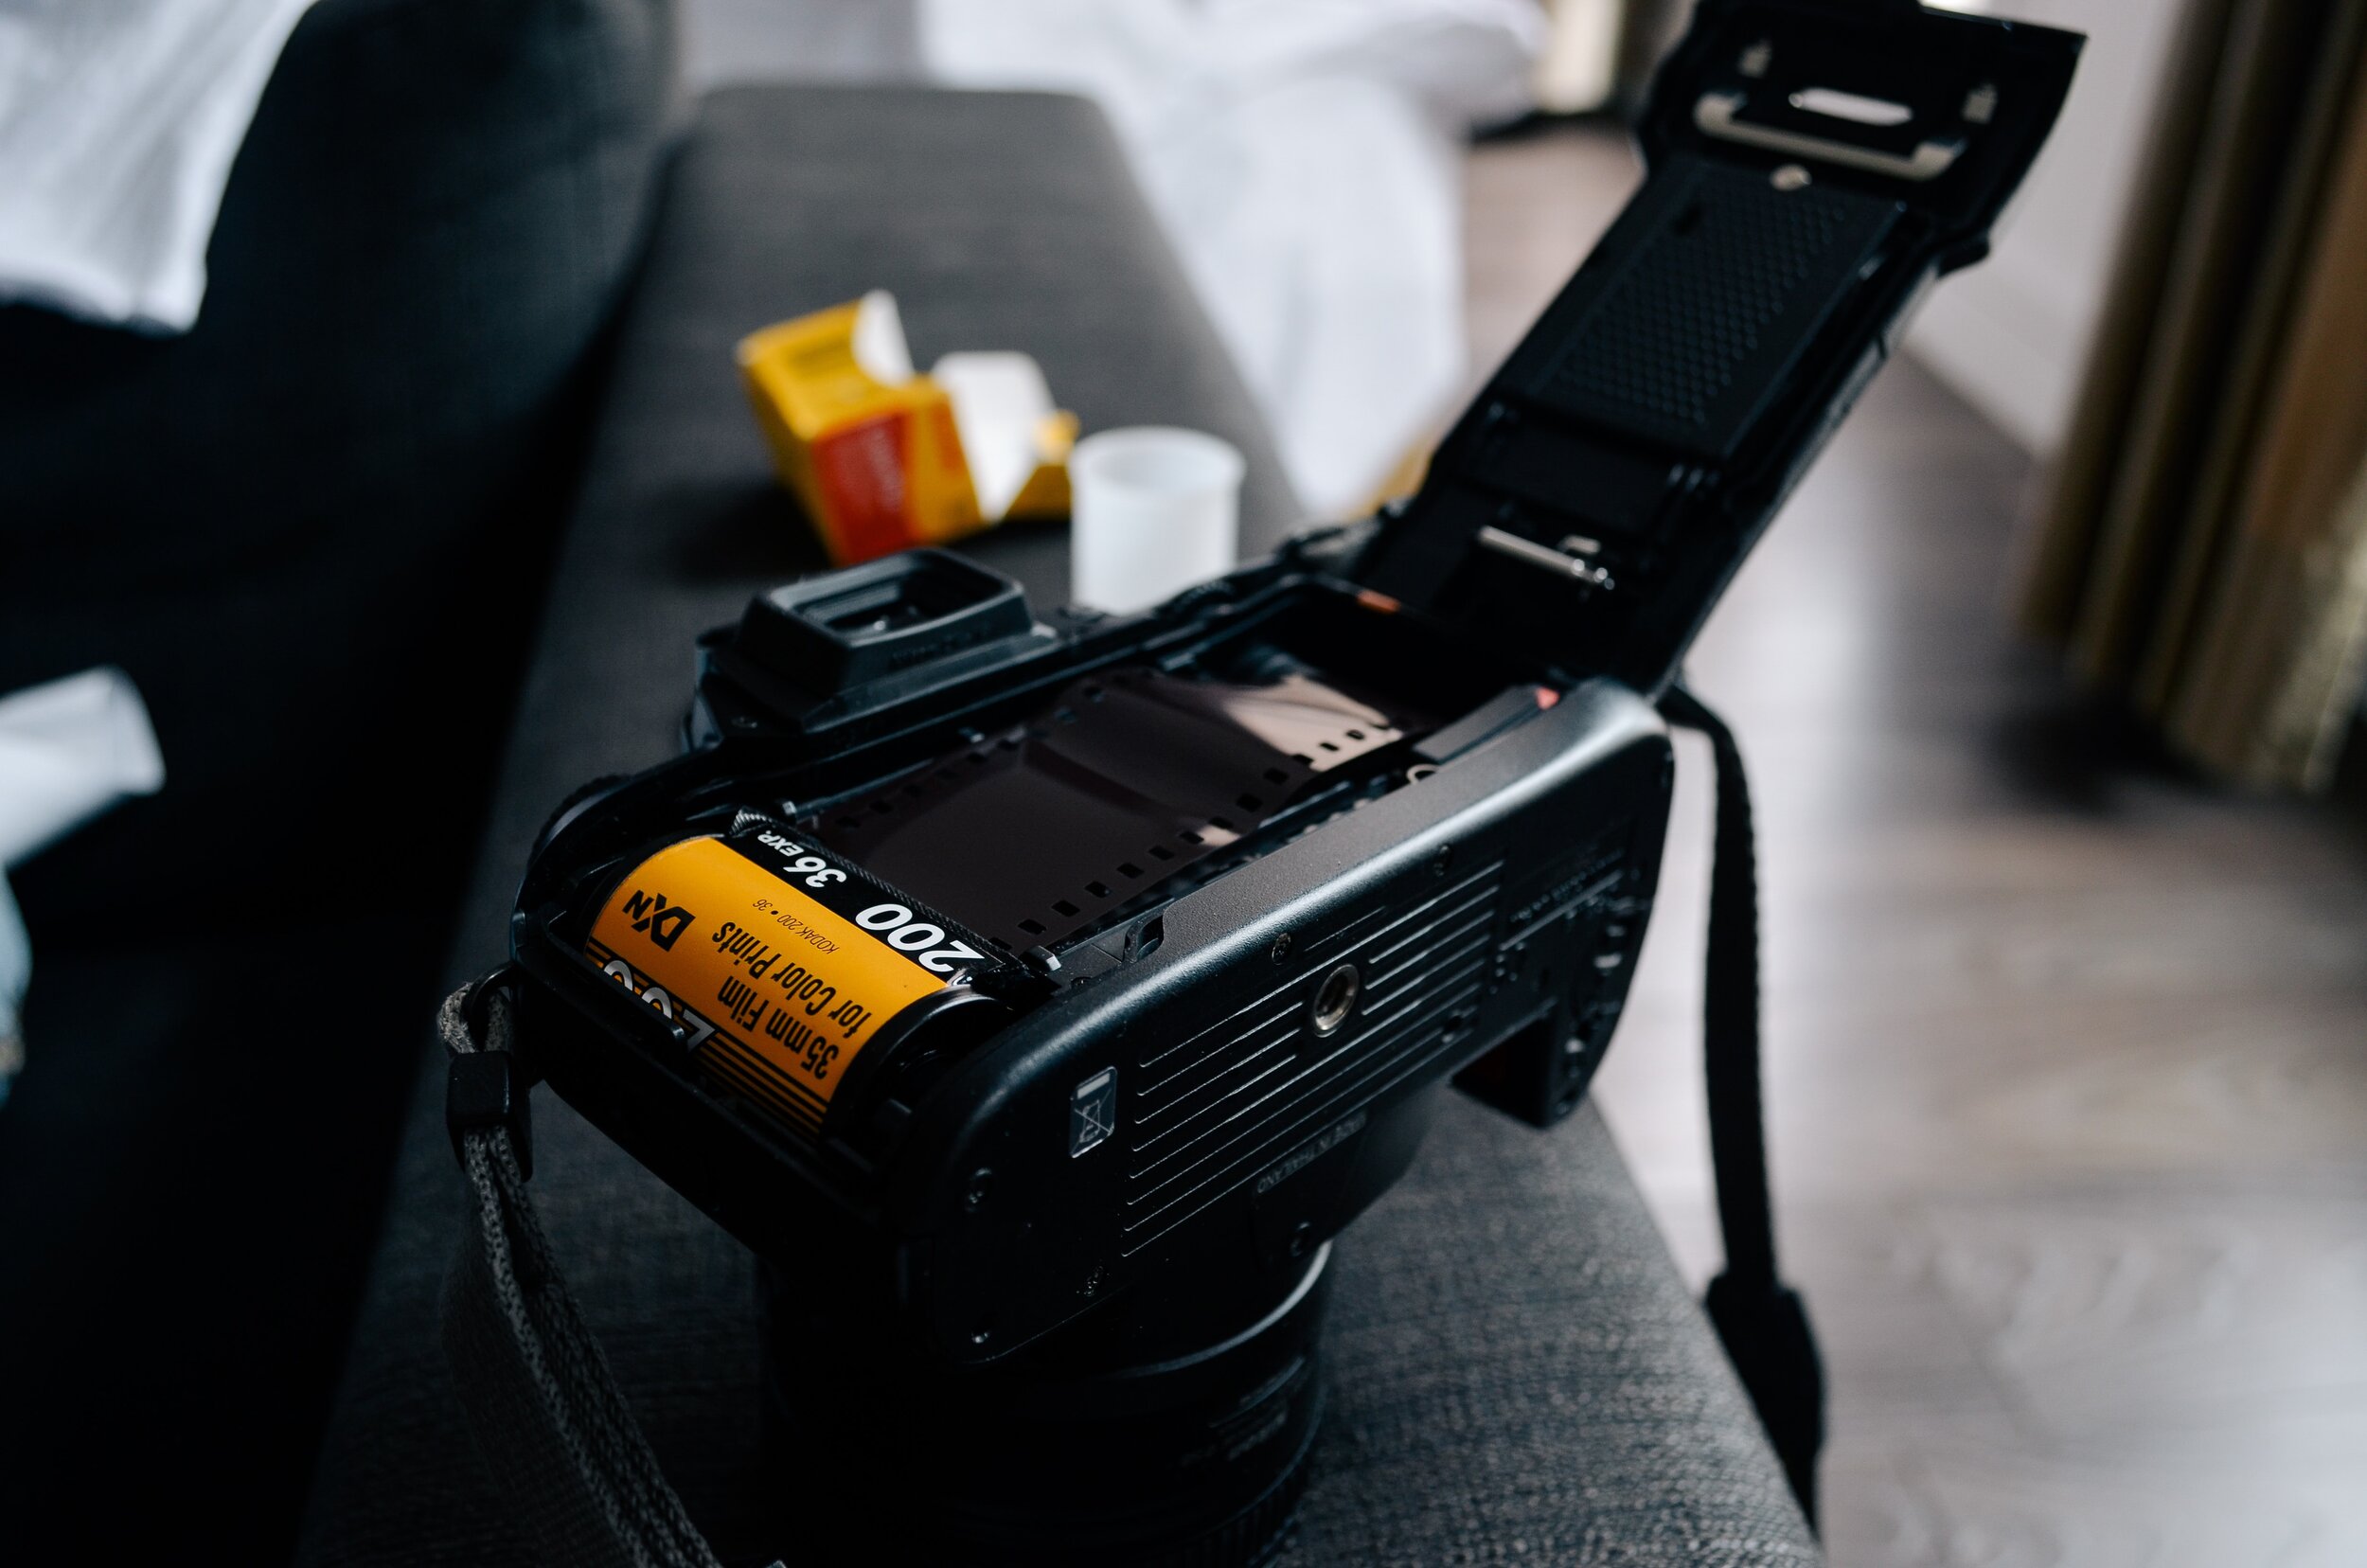
To begin the process, you've got to pry open the film cartridge, get the exposed film loaded onto a reel and locked into the developing tank. All of this has to be done inside the changing bag of course to avoid exposing the film to any light. This is easier said than done and honestly it's worth sacrificing a roll of film for a practice run without using the changing bag.
Load Film onto Reels and into Developing Tank
Get your roll of 35 mm film, scissors, bottle opener, film reel, developing tank. Place them in the changing bag and zip it up. Using your hands get a sense of where the items are in the bag (hopefully you have the bag sitting on a flat surface so things are moving around).
Using the bottle opener, pry open the film cartridge and remove the coiled film. You'll need to hold the film carefully, while using the scissors to cut off the leader. Now feed the film into the reel until you can ratchet it the rest of the way. A lot of frustrations in this part can be mitigated by making sure paid attention earlier to which way the reel needs to be facing when you feed the film into it.
Once your film is loaded into the reel, fit it onto the center post and place it into the developing tank. Attach the funnel shaped lid and lock it into place. It's now safe to open up your changing bag and head to the room where you'll be processing the film with your chemicals. Whether it's a bathroom or laundry room - you'll need a sink with running water and room to arrange your beakers.
Prepare the Chemistry
How many milliliters of developer, stop bath and fixer you need in this step will be dependent on the type of developing tank you have and how many reels and the type of film (35 mm or 120) you are developing. If you're using a Paterson tank, the amounts are listed on the underside of the tank. For my 2 reel tank, I need to use 290 ml of water/chemicals for each step, per reel for 35 mm film. For 120 film, it requires 500 ml.
For this example, we're going to develop a single reel of C-41 film. So we're going to need 290 ml of distilled water at 102 degrees. 290 ml of developer at 102 degrees, 290 ml of blix at 102 degrees & 290ml of stabilizer at room temperature ready to go. It's a good idea to label the beakers to avoid cross contamination once you get started as you'll still need to know which chemical came out of which beaker. Use your thermometer to check temperatures but wipe it off each time to avoid cross contamination of chemicals.
Developing Time
This information is almost straight from the instructions that are included in the Unicolor Kit. Those instructions will include the agitation information for each step as well.
Step 1 Pre-Soak 1 min 102°f
Step 2 Developer 3:30 min 102°f
Step 3 Blix 6:30 min 102°f
Step 4 Wash 3 min 95°f - 105°f
Step 5 Stabilizer :30 - 1 min Room
Step 6 Dry 2+ hours Less than 140°f
Process Film
1. Pre-soak the film with the 102°F distilled water. Let it sit for 1 minute then pour back into beaker or down the drain. Whichever is more convenient at the moment.
2. Pour in the 102°F Developer and hit the timer for 3:30 min. Cover the tank with the additional lid to prevent spillage. Tap the tank a few times to dislodge air bubbles around the film. Twist the tank 180 degrees vertically 4 times in the first 10 seconds. Repeat this every 30 seconds for the remaining time. When the timer is up, remove the additional lid and pour the developer back into the beaker labeled developer.
3. Pour in the 102°F Blix. Cover the tank again with the additional cover and follow the same agitation method for 6:30 min. When complete, pour the Blix into its corresponding beaker just as before.
4. Wash. For this step you will move to the sink and run 95°F - 105°F water directly from the tap into the tank for 3 minutes - letting if overflow. Once you’ve reached this point its safe to remove the tank lid - though I generally leave it on.
5. And now the Stabilizer is added for :30 sec - 1 min at room temperature. Agitate for the first 15 seconds and it can sit still the rest of the time. And upon completion pour it back into it’s corresponding beaker.
6. Now it’s time to Dry your film. Remove it from the reels, attach to film clip, hang it up and squeegee the excess water off of it. Hopefully you have a bathroom that it can hang up in undisturbed over night. A room with the least amount of dust floating around is ideal.
At this point, if you haven’t already, return the used Developer, Blix & Stabilizer from the beakers to their respective storage containers.
But that's it. Once it’s dry - usually no less than 2 hours you can cut it and scan it.
Personally I use and Epson V600 scanner. Below are couple scans of photos I recently developed at home using this process.
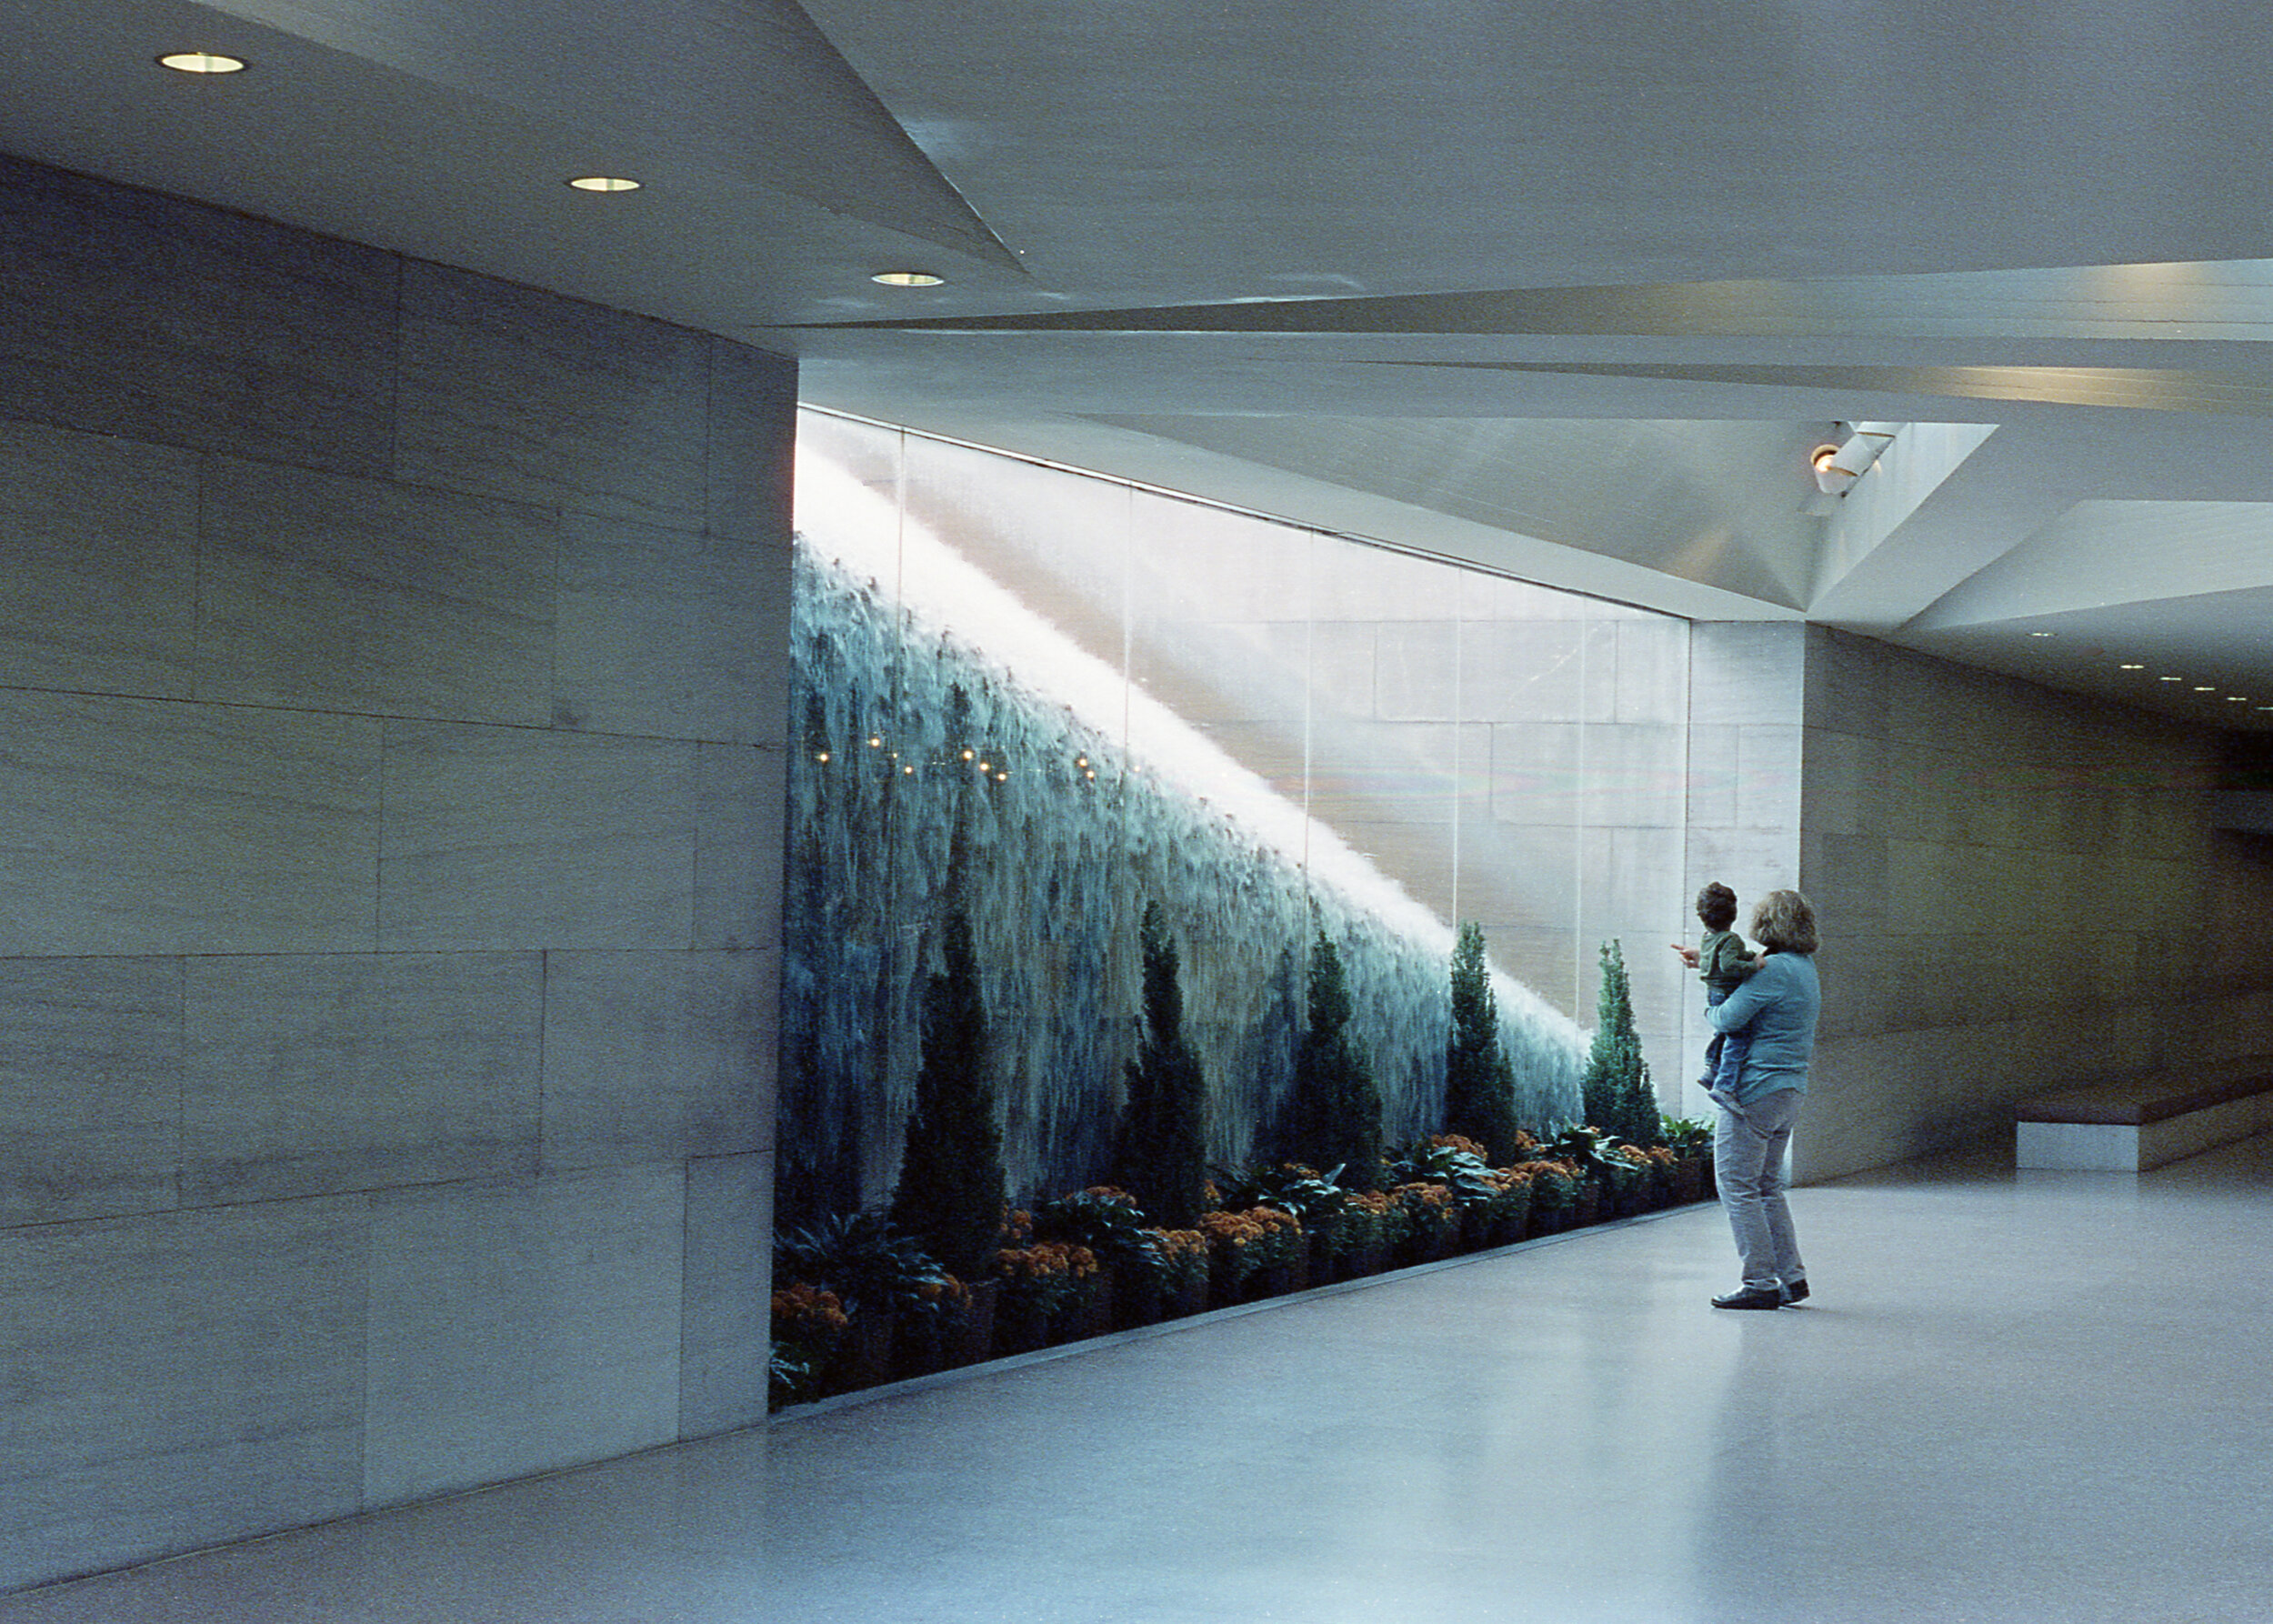
National Gallery of Art / CineStill 800t
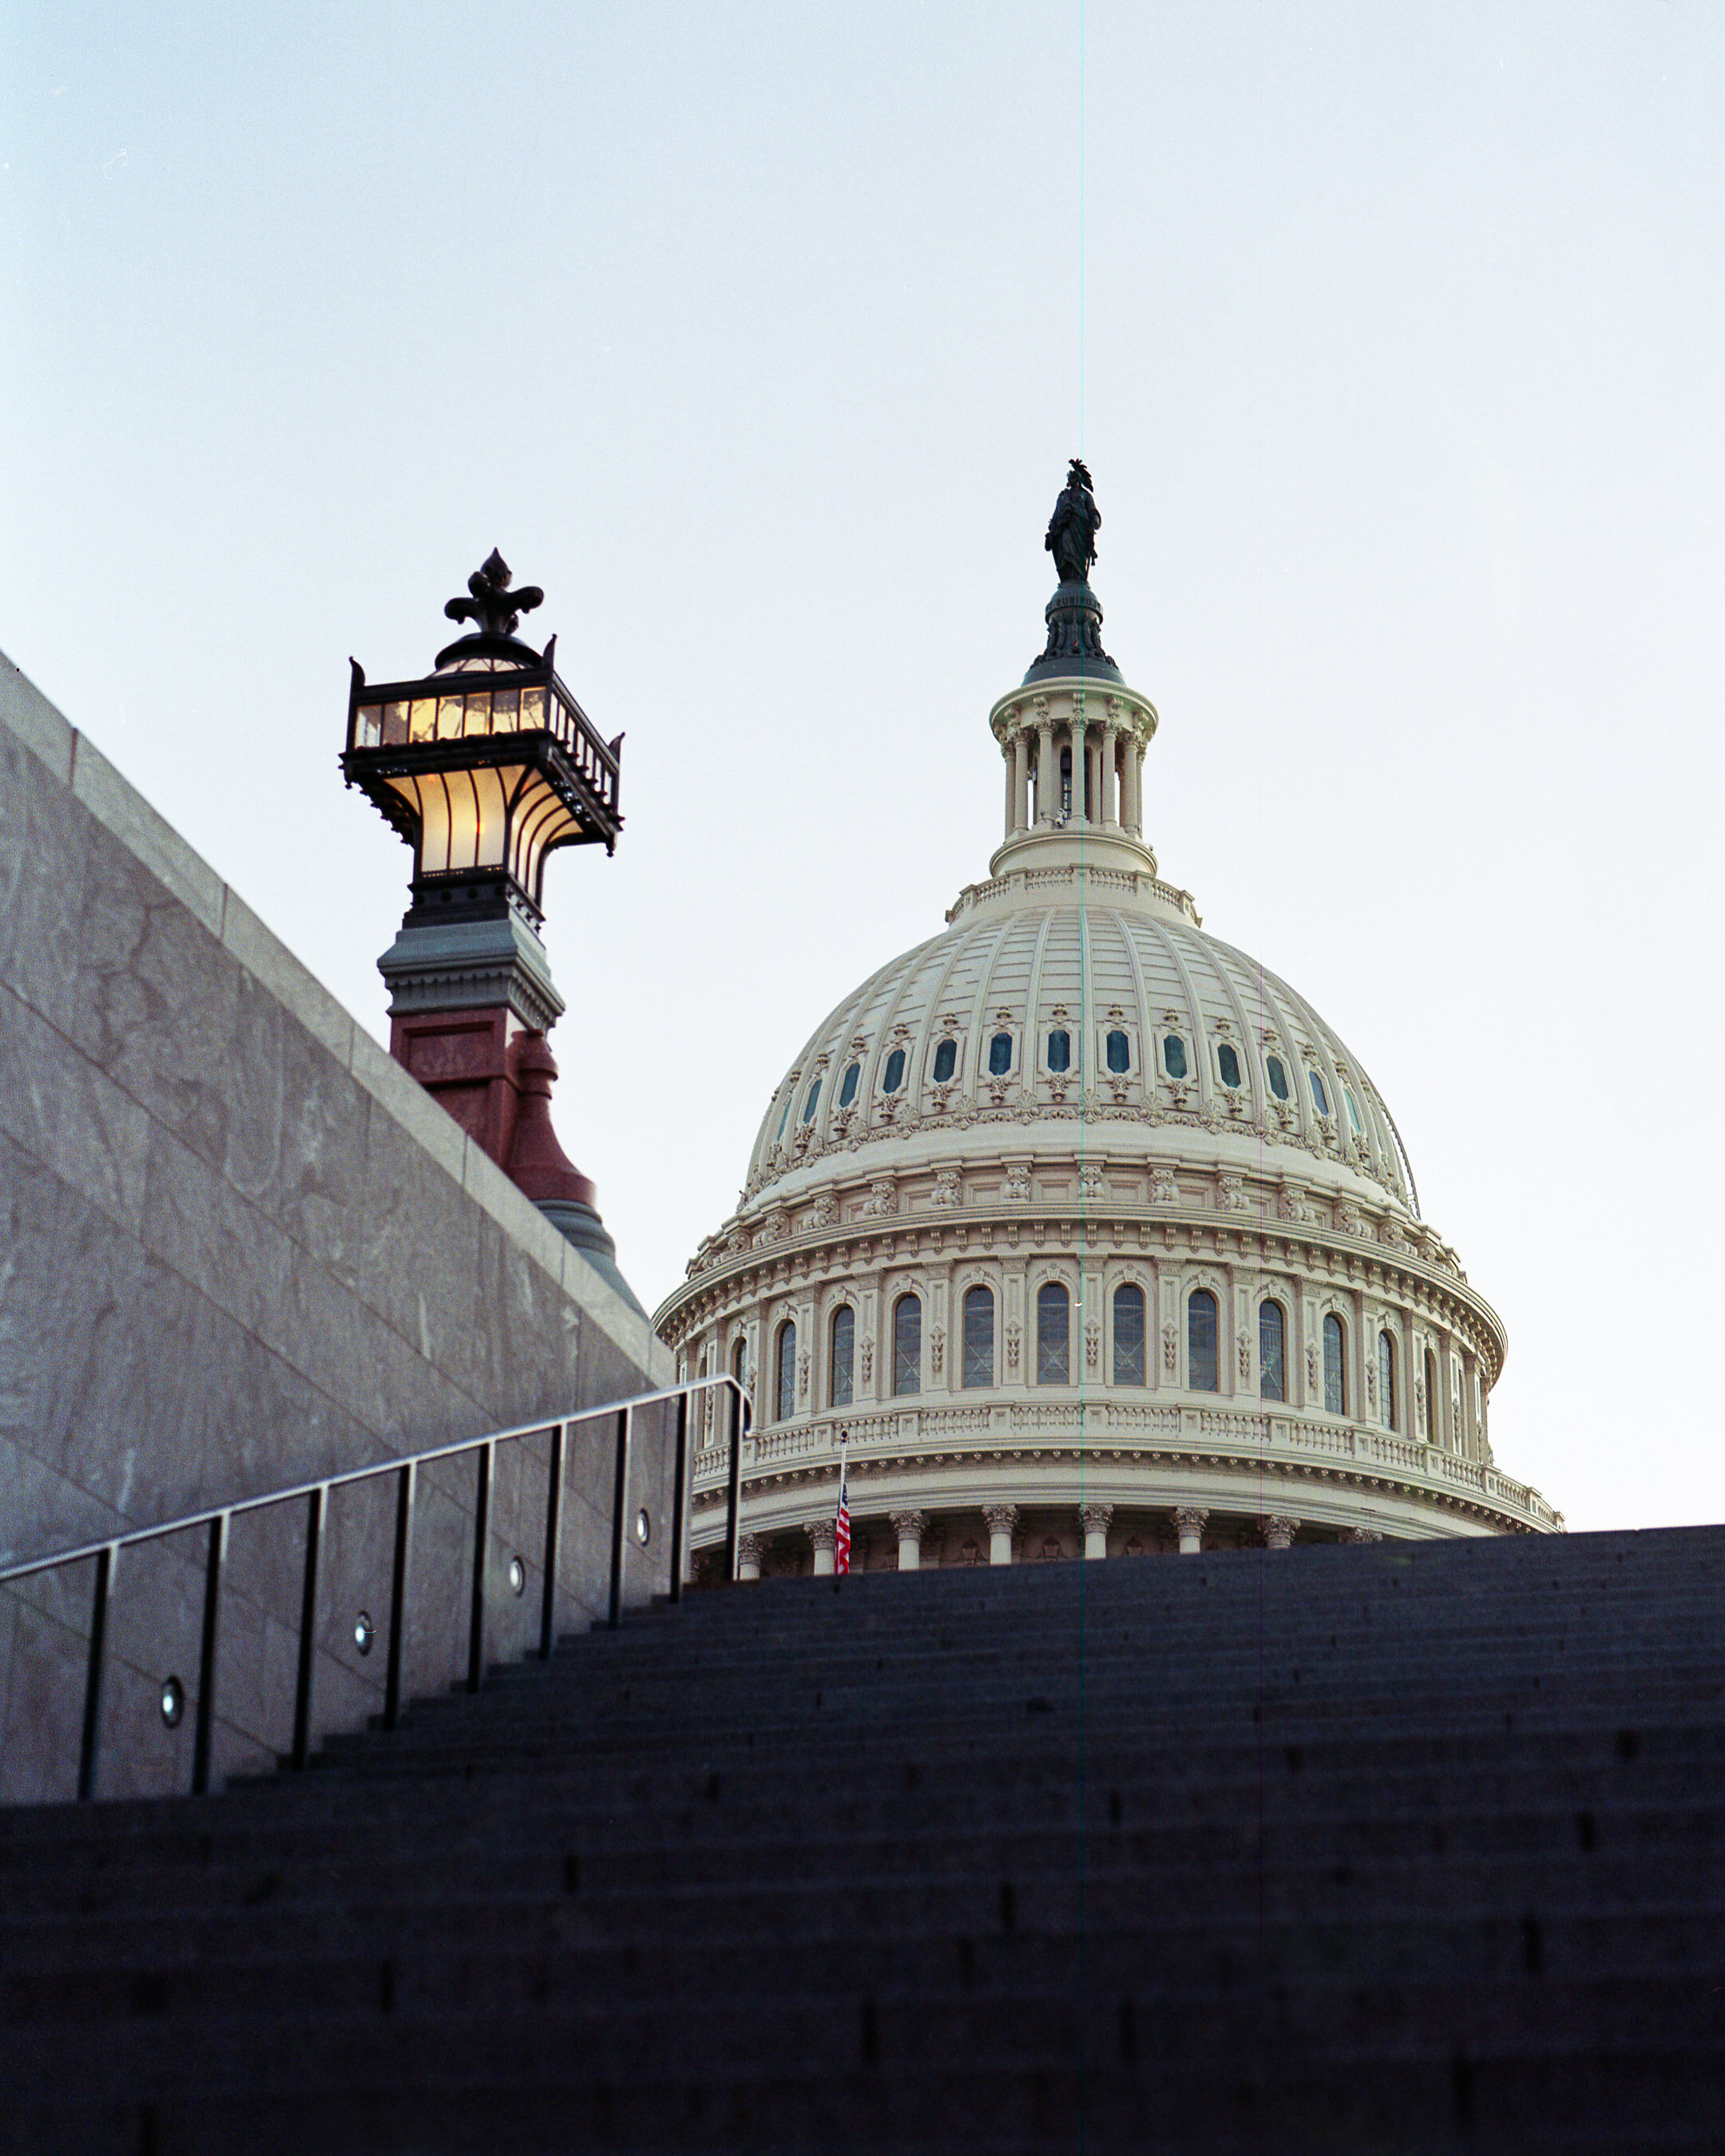
US Capitol Building / Kodak Portra 800
Mark Mackoviak lives in Washington, DC and is a founder of Focal Collective.