Shooting Analog Infrared Images
Infrared Film Stocks and Where to Purchase
While most Infrared film stocks have been discontinued, there are still a few purchasing options available, mostly on eBay:
Color
- Kodak Aerochrome III Infrared Film 1443 35mm (ISO 40) (Discontinued 2007)
- FPP 35MM INFRARED FILM - COLOR IR (Ambiguous)
- Lomo Lomochrome Purple XR 100-400 35mm (Emulates Color Infrared - Available)
Black and White
- Rollei Infared 400 ISO Black & White Film, 35mm (Available)
- FPP 35MM INFRARED FILM - BW IR (Available)
- Kodak HIE 135-36 Hi-Speed Infrared Black & White (Discontinued 2007)
- Ilford SFX 200 Infrared 135-36 Black & White (Discontinued 2004)
Choosing Film Speed
Different Infrared film stocks have different sensitivities to IR light. As an example Kodak HIE film is one of the most sensitive IR films on the market, recording down to 920nm on the spectrum. Siince it is more sensitive to light, it is a faster film allowing the use of faster shutter speeds. In contrast, Ilford SFX records down to 740nm and would require a slower shutter speed to achieve proper exposure.
Filter Choices
When shooting Infrared you need to use a filter which blocks all light on the electromagnetic spectrum except light in the range of 700-1200nm. This allows only the infrared light to pass through the lens, and blocks out other light sources.
Most popularly, a Tiffen #12 yellow Filter is used, though you can experiment with Orange and Red filters.
Usually for black and white, Infrared 720 89B filters are also used, though these denser filters are pricier.
Focusing IR Light
Since most visible light is blocked when using an IR filter, you will not see anything when you look through the viewfinder when using true Infrared Filters. Meaning you will have a hard time using autofocus and composing your shots.
Different wavelengths of light focus at different distances and usually vintage camera lenses have infrared marks on them. This mismatch between focus distances is called the Infrared Focus Shift. Modern lenses usually don’t include the IR adjustment focus marker, but this is an example of what to look out for:
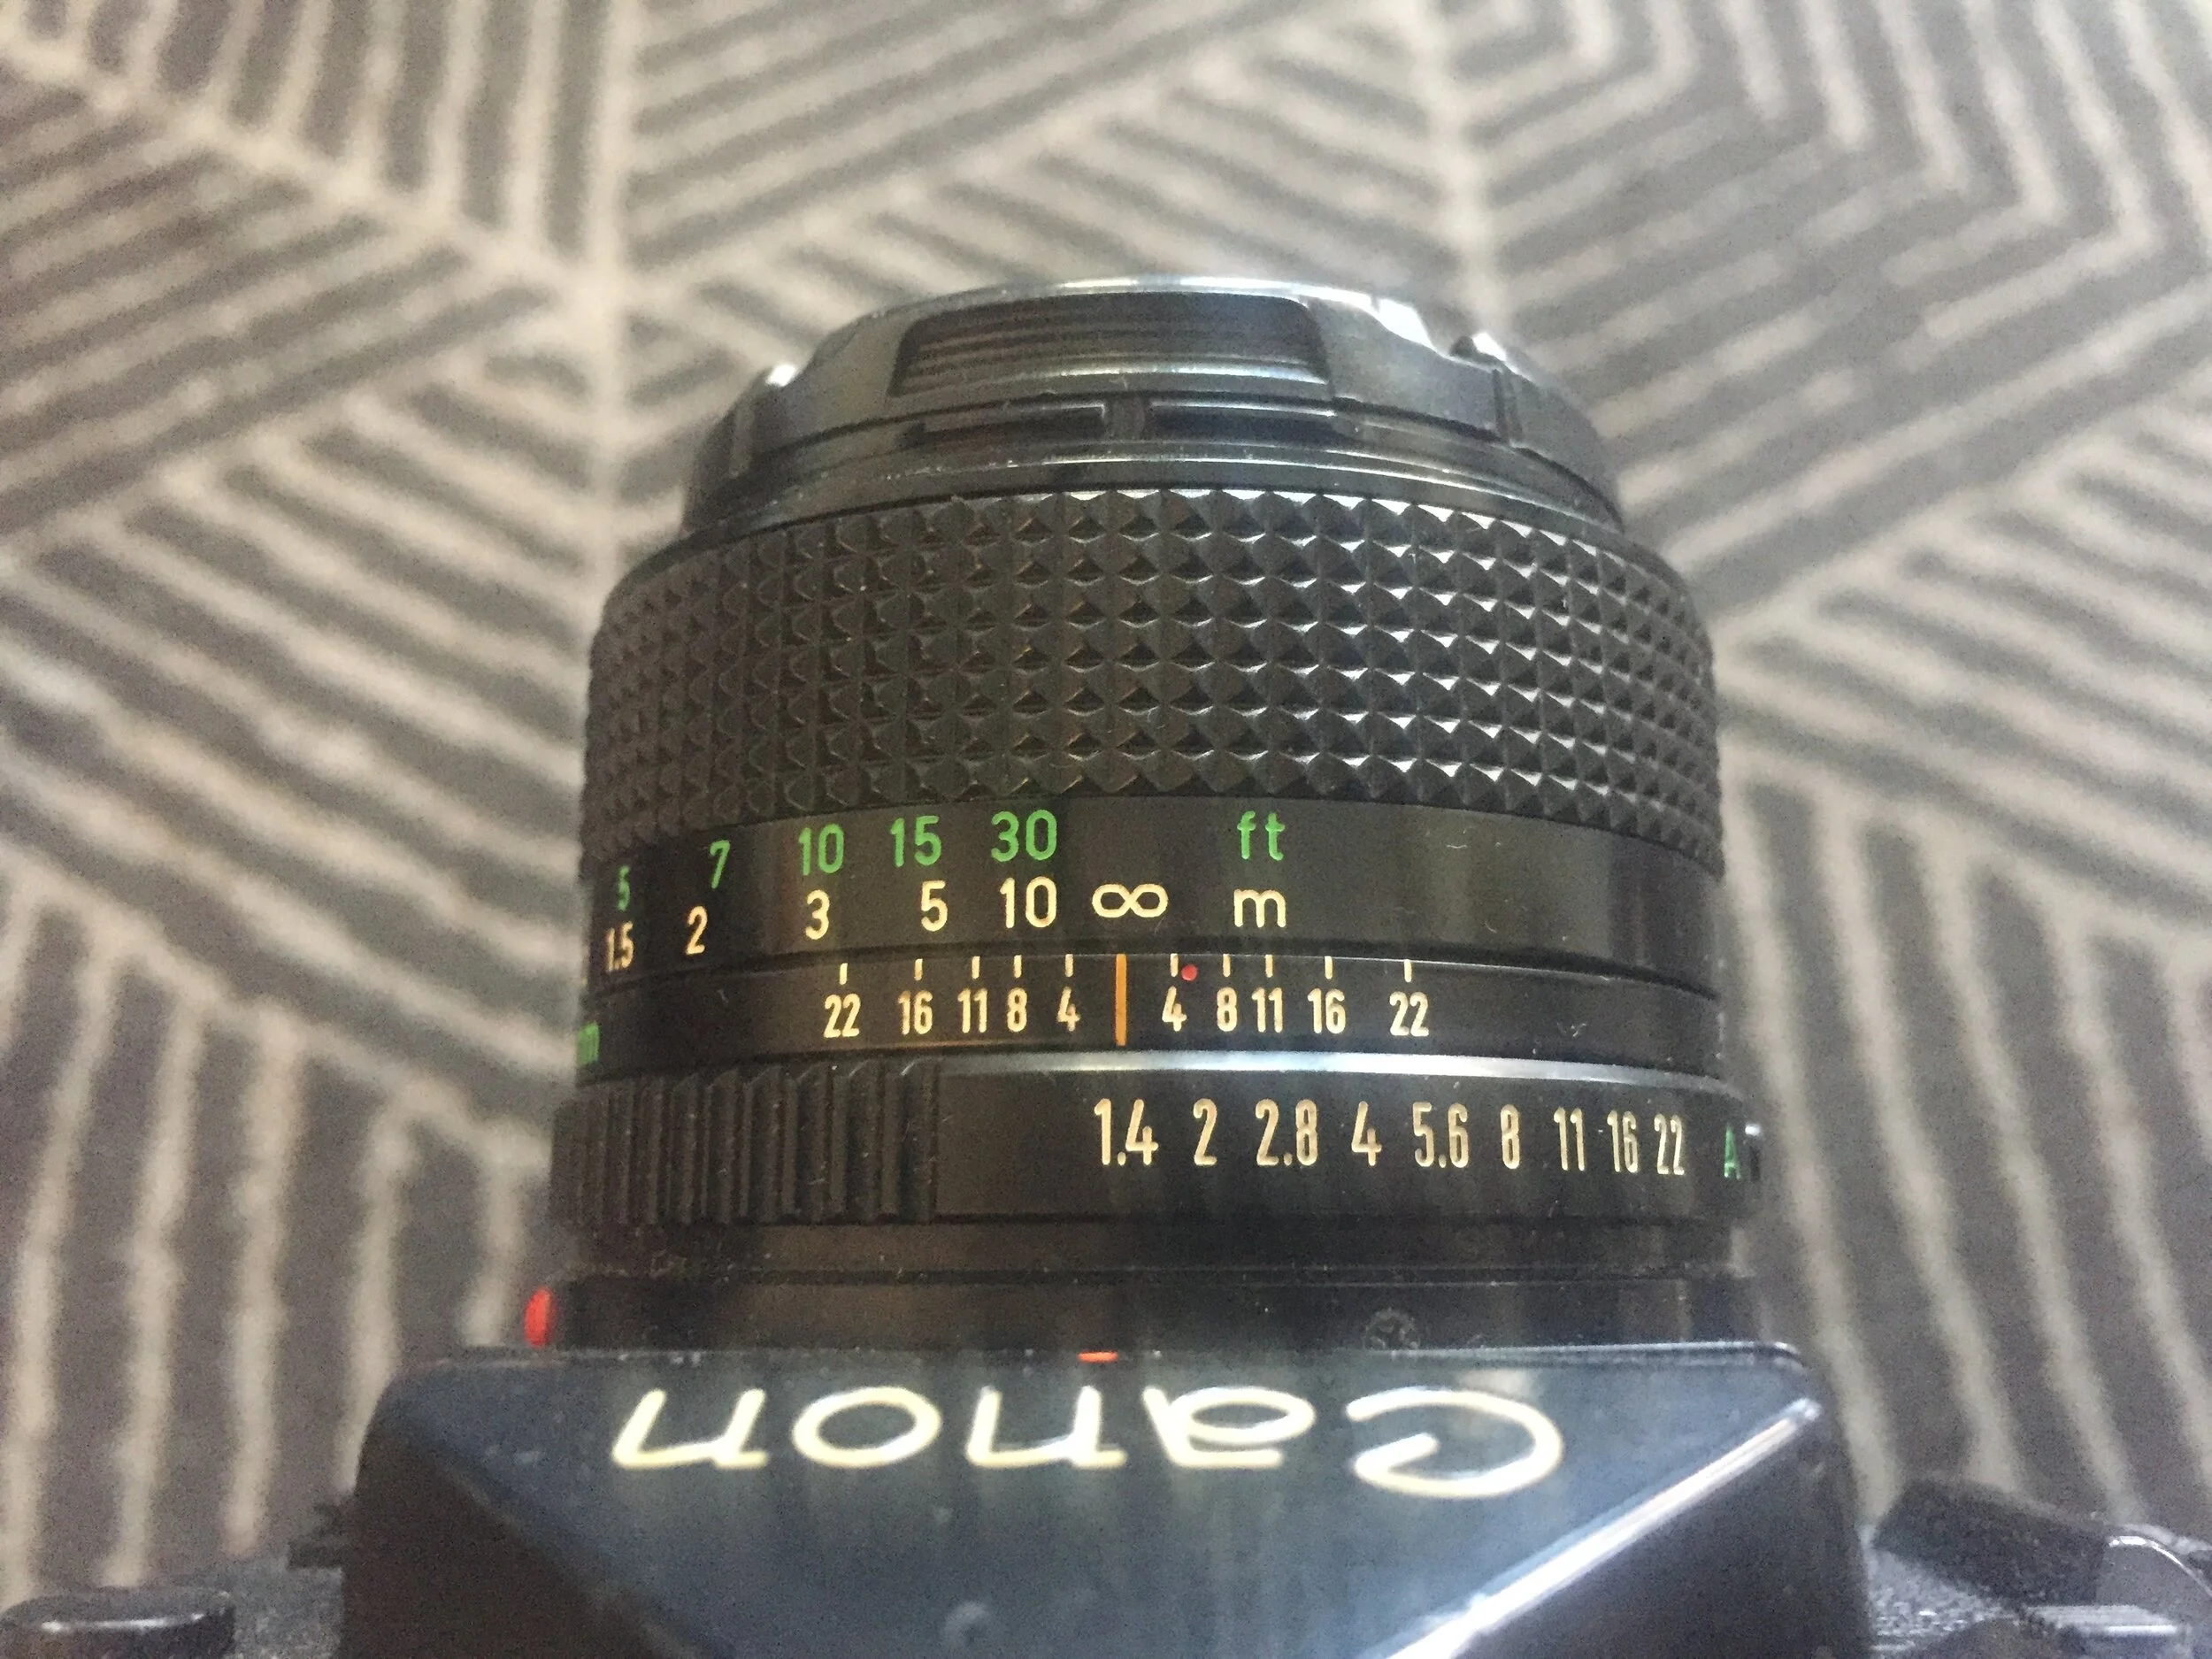
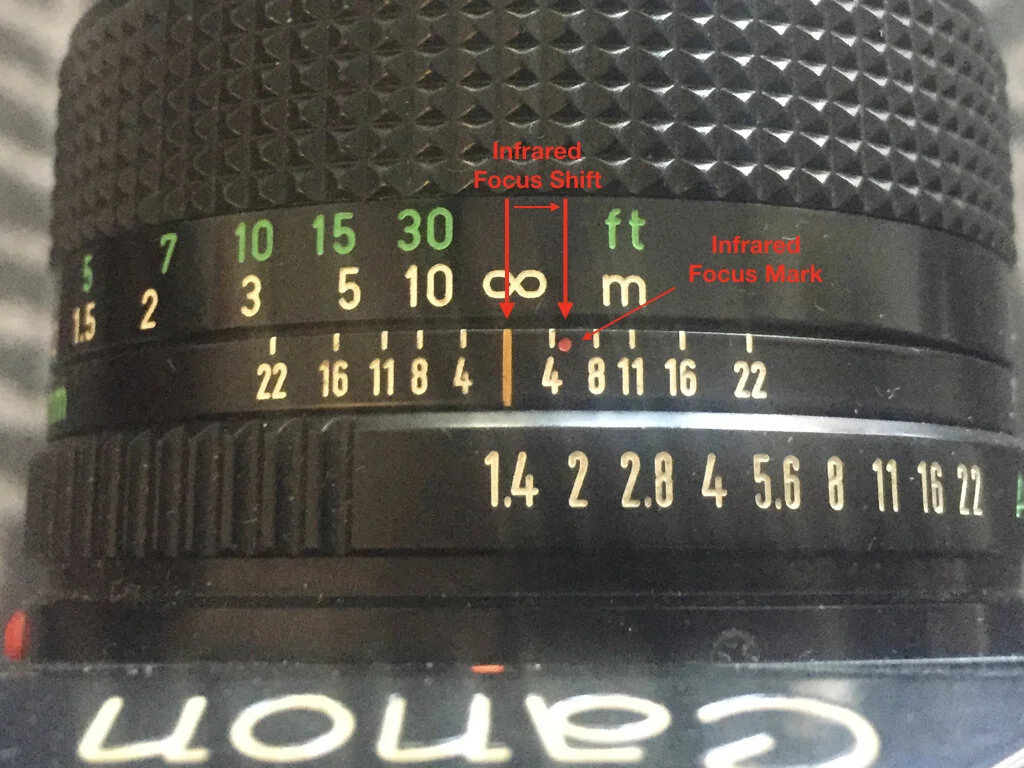
When using the IR Focus Mark you’ll need to nail your focus before attaching the Infrared filter to your lens, then you shift the focus to approximate distance of the IR Focus Shift to adjust for IR light. This gets tricky for any zoom lens since there will be numerous IR Focus Marks at different distances. The best you can do is approximate where that IR focus point would be within the markings.
As a DIY hack, you have the option to mark your own IR Focus Marks on the lens using trial and error and estimating the size of the Focus Shift, though this is incredibly tedious and difficult to get perfect.
Another option is to close the aperture as small as possible to achieve a deeper depth of field and hope your image falls within that scope. Though the image will take longer to expose.
Properly Exposing IR Photos
When using a true IR filer, metering will not work since there will be no visible light to meter. Even external light meters will be inaccurate, as they measure the visible light in the environment and do not account for IR photography.
You should rely on manual exposure when shooting IR and take a few different photos at different exposures of the same scene to ensure you nail the lighting. Traditional IR film does not have ISO ratings, only approximations. A general rule of thumb is to shoot in broad daylight since this is when you’ll be able to photograph infrared light at it’s strongest. Bright skies allow for faster shutter speeds as well.
**Shoot only in sunlight.
More information regarding each film and tips for exposing properly can usually be found with the descriptions of the product on eBay.

Expected Color Cast
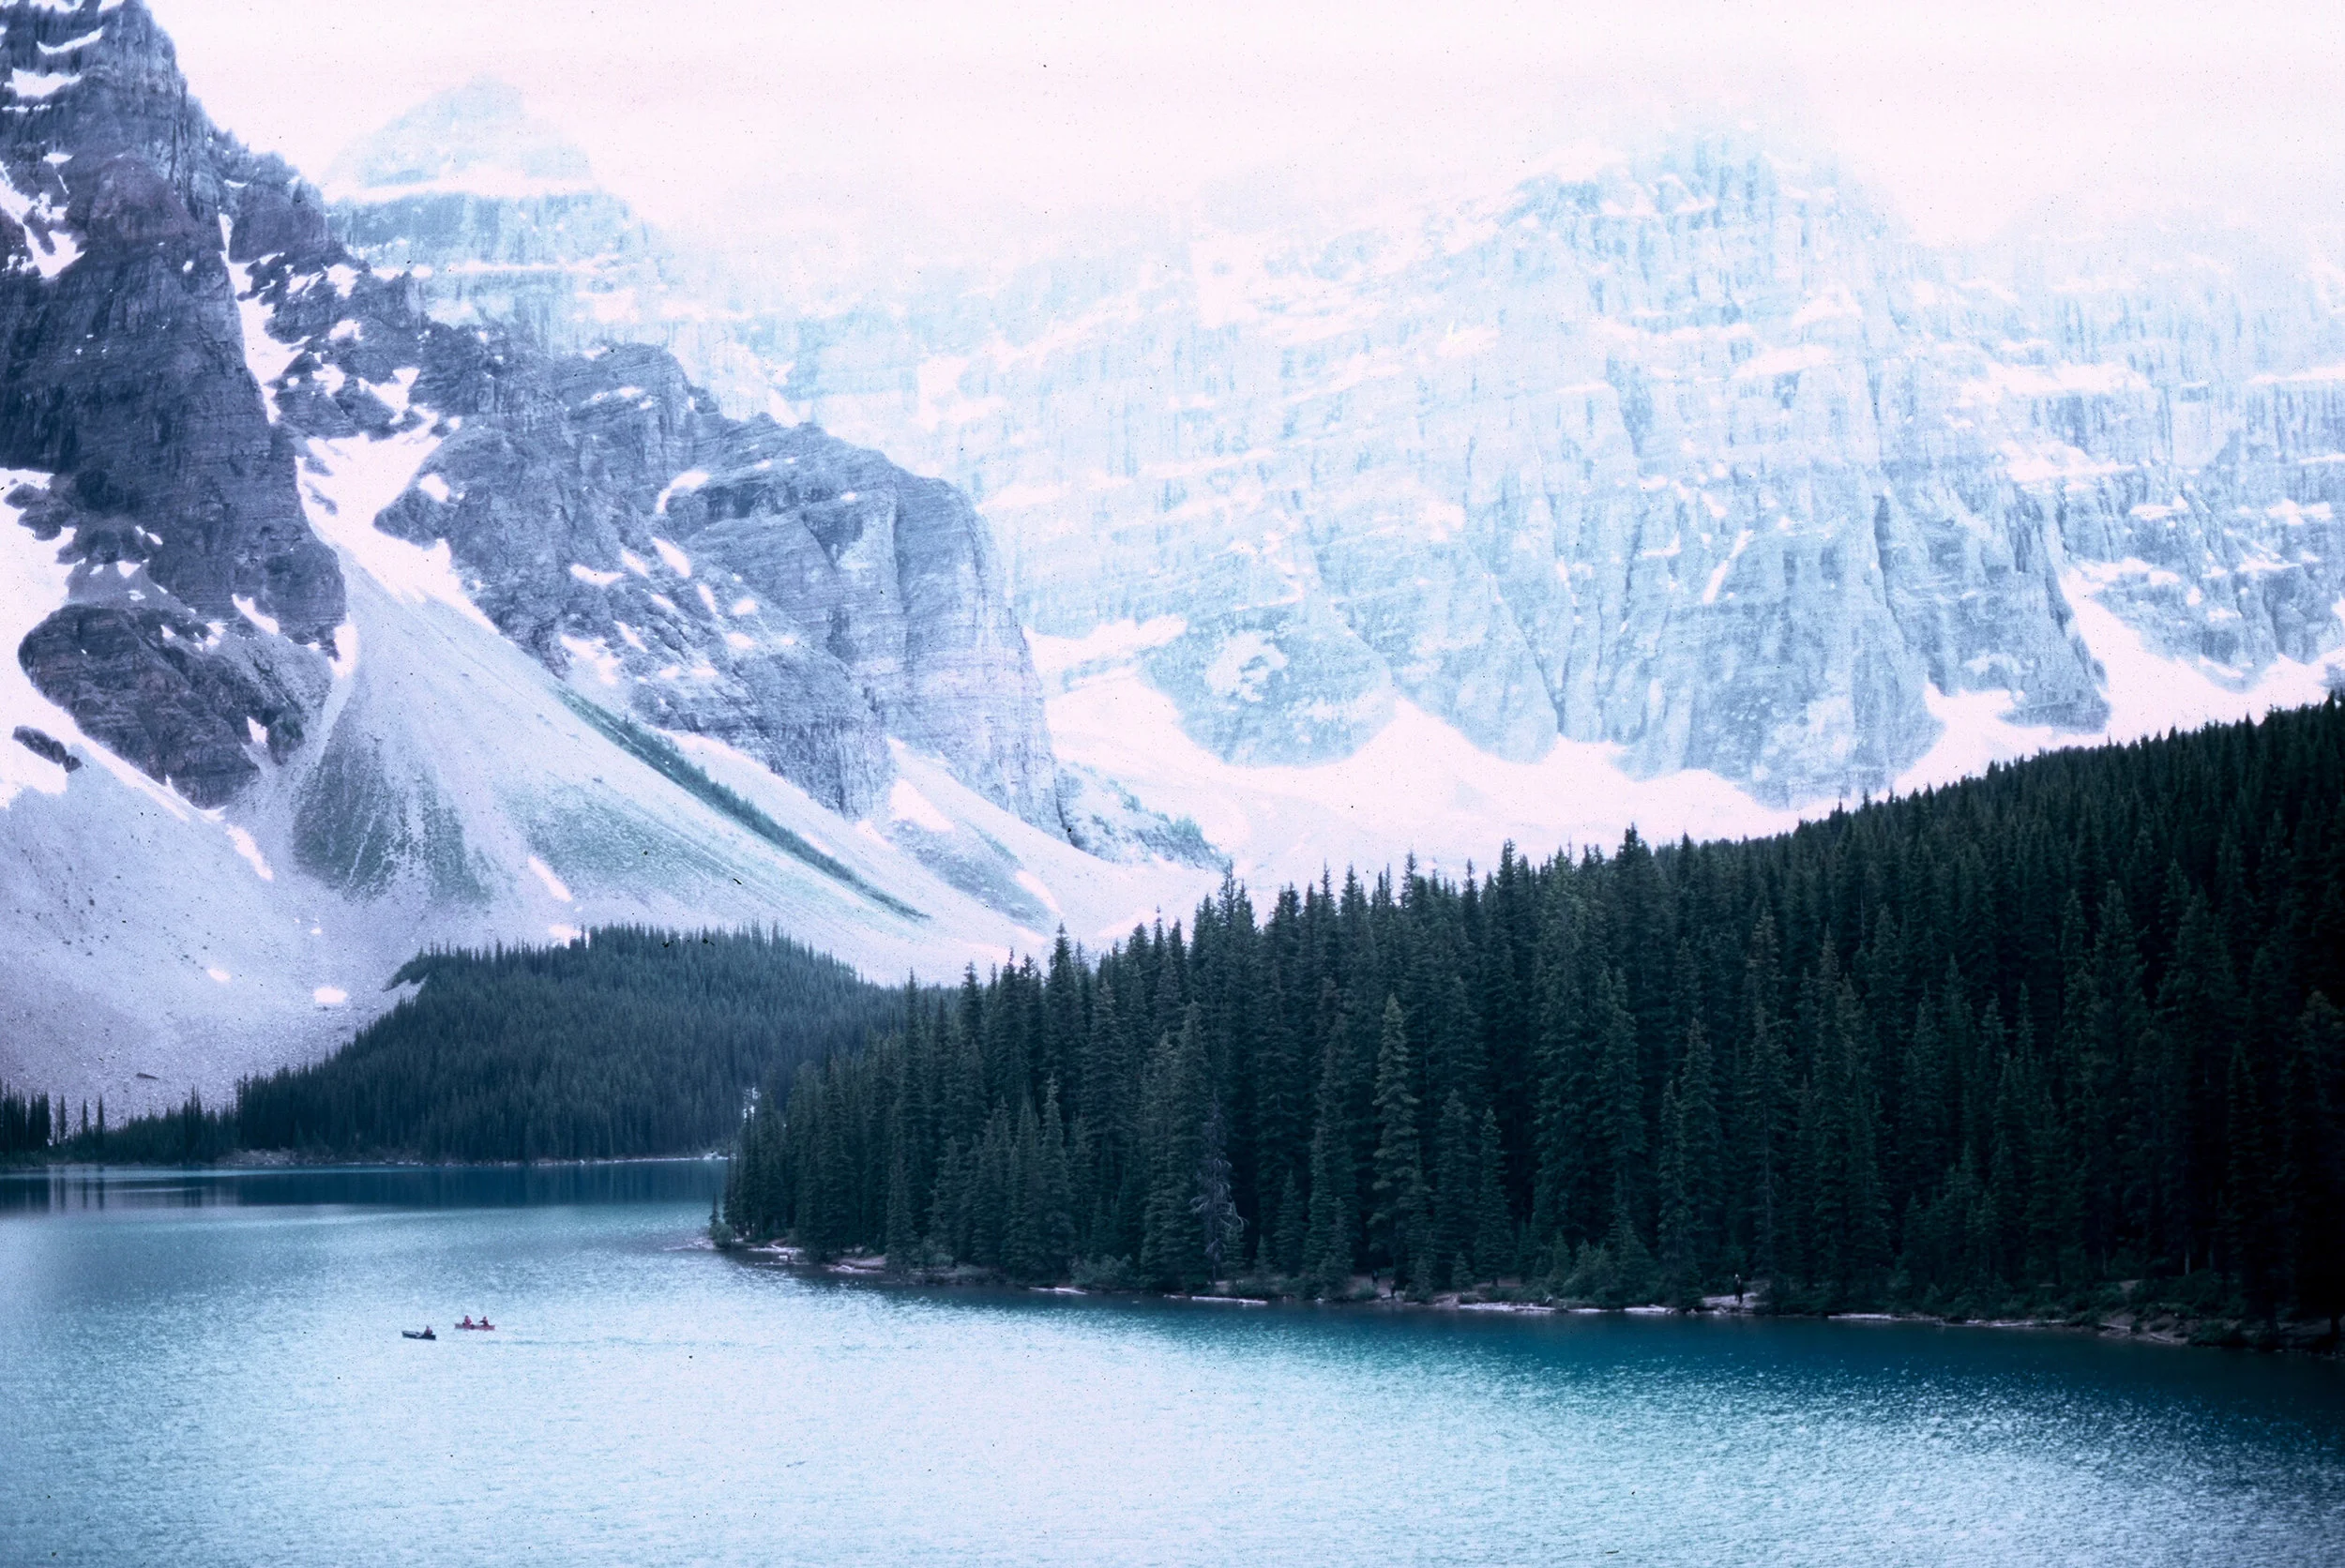
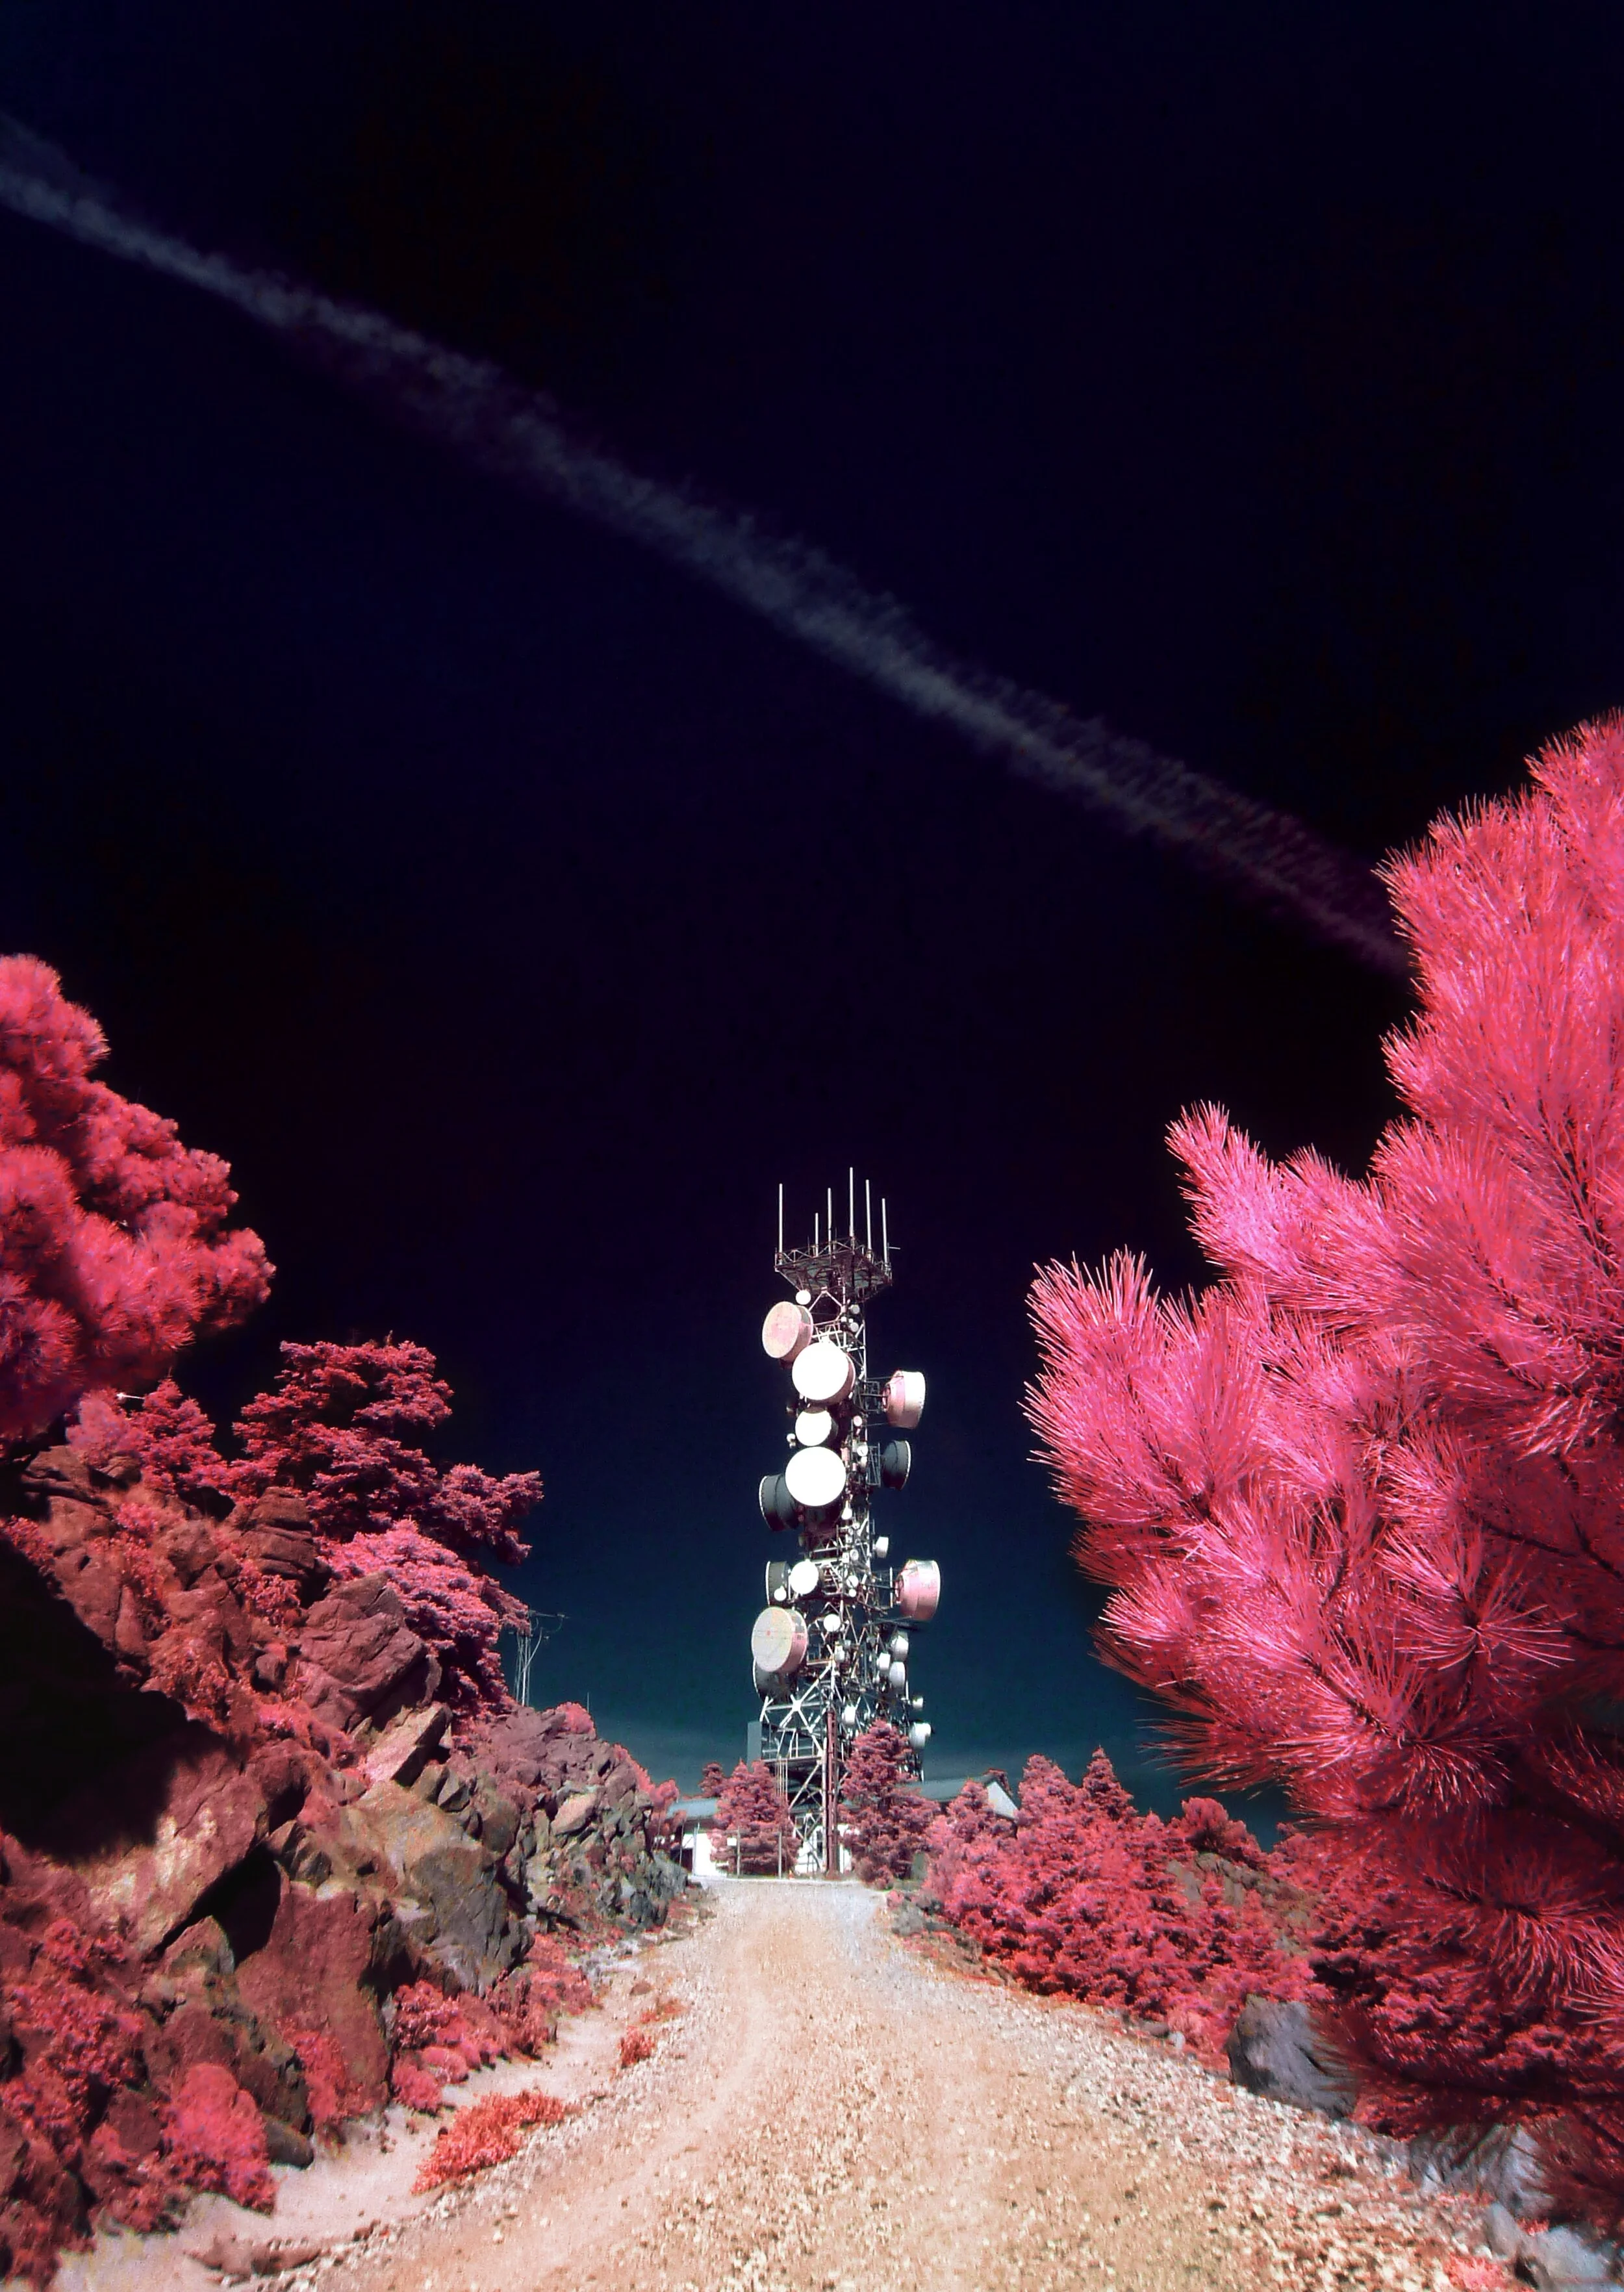
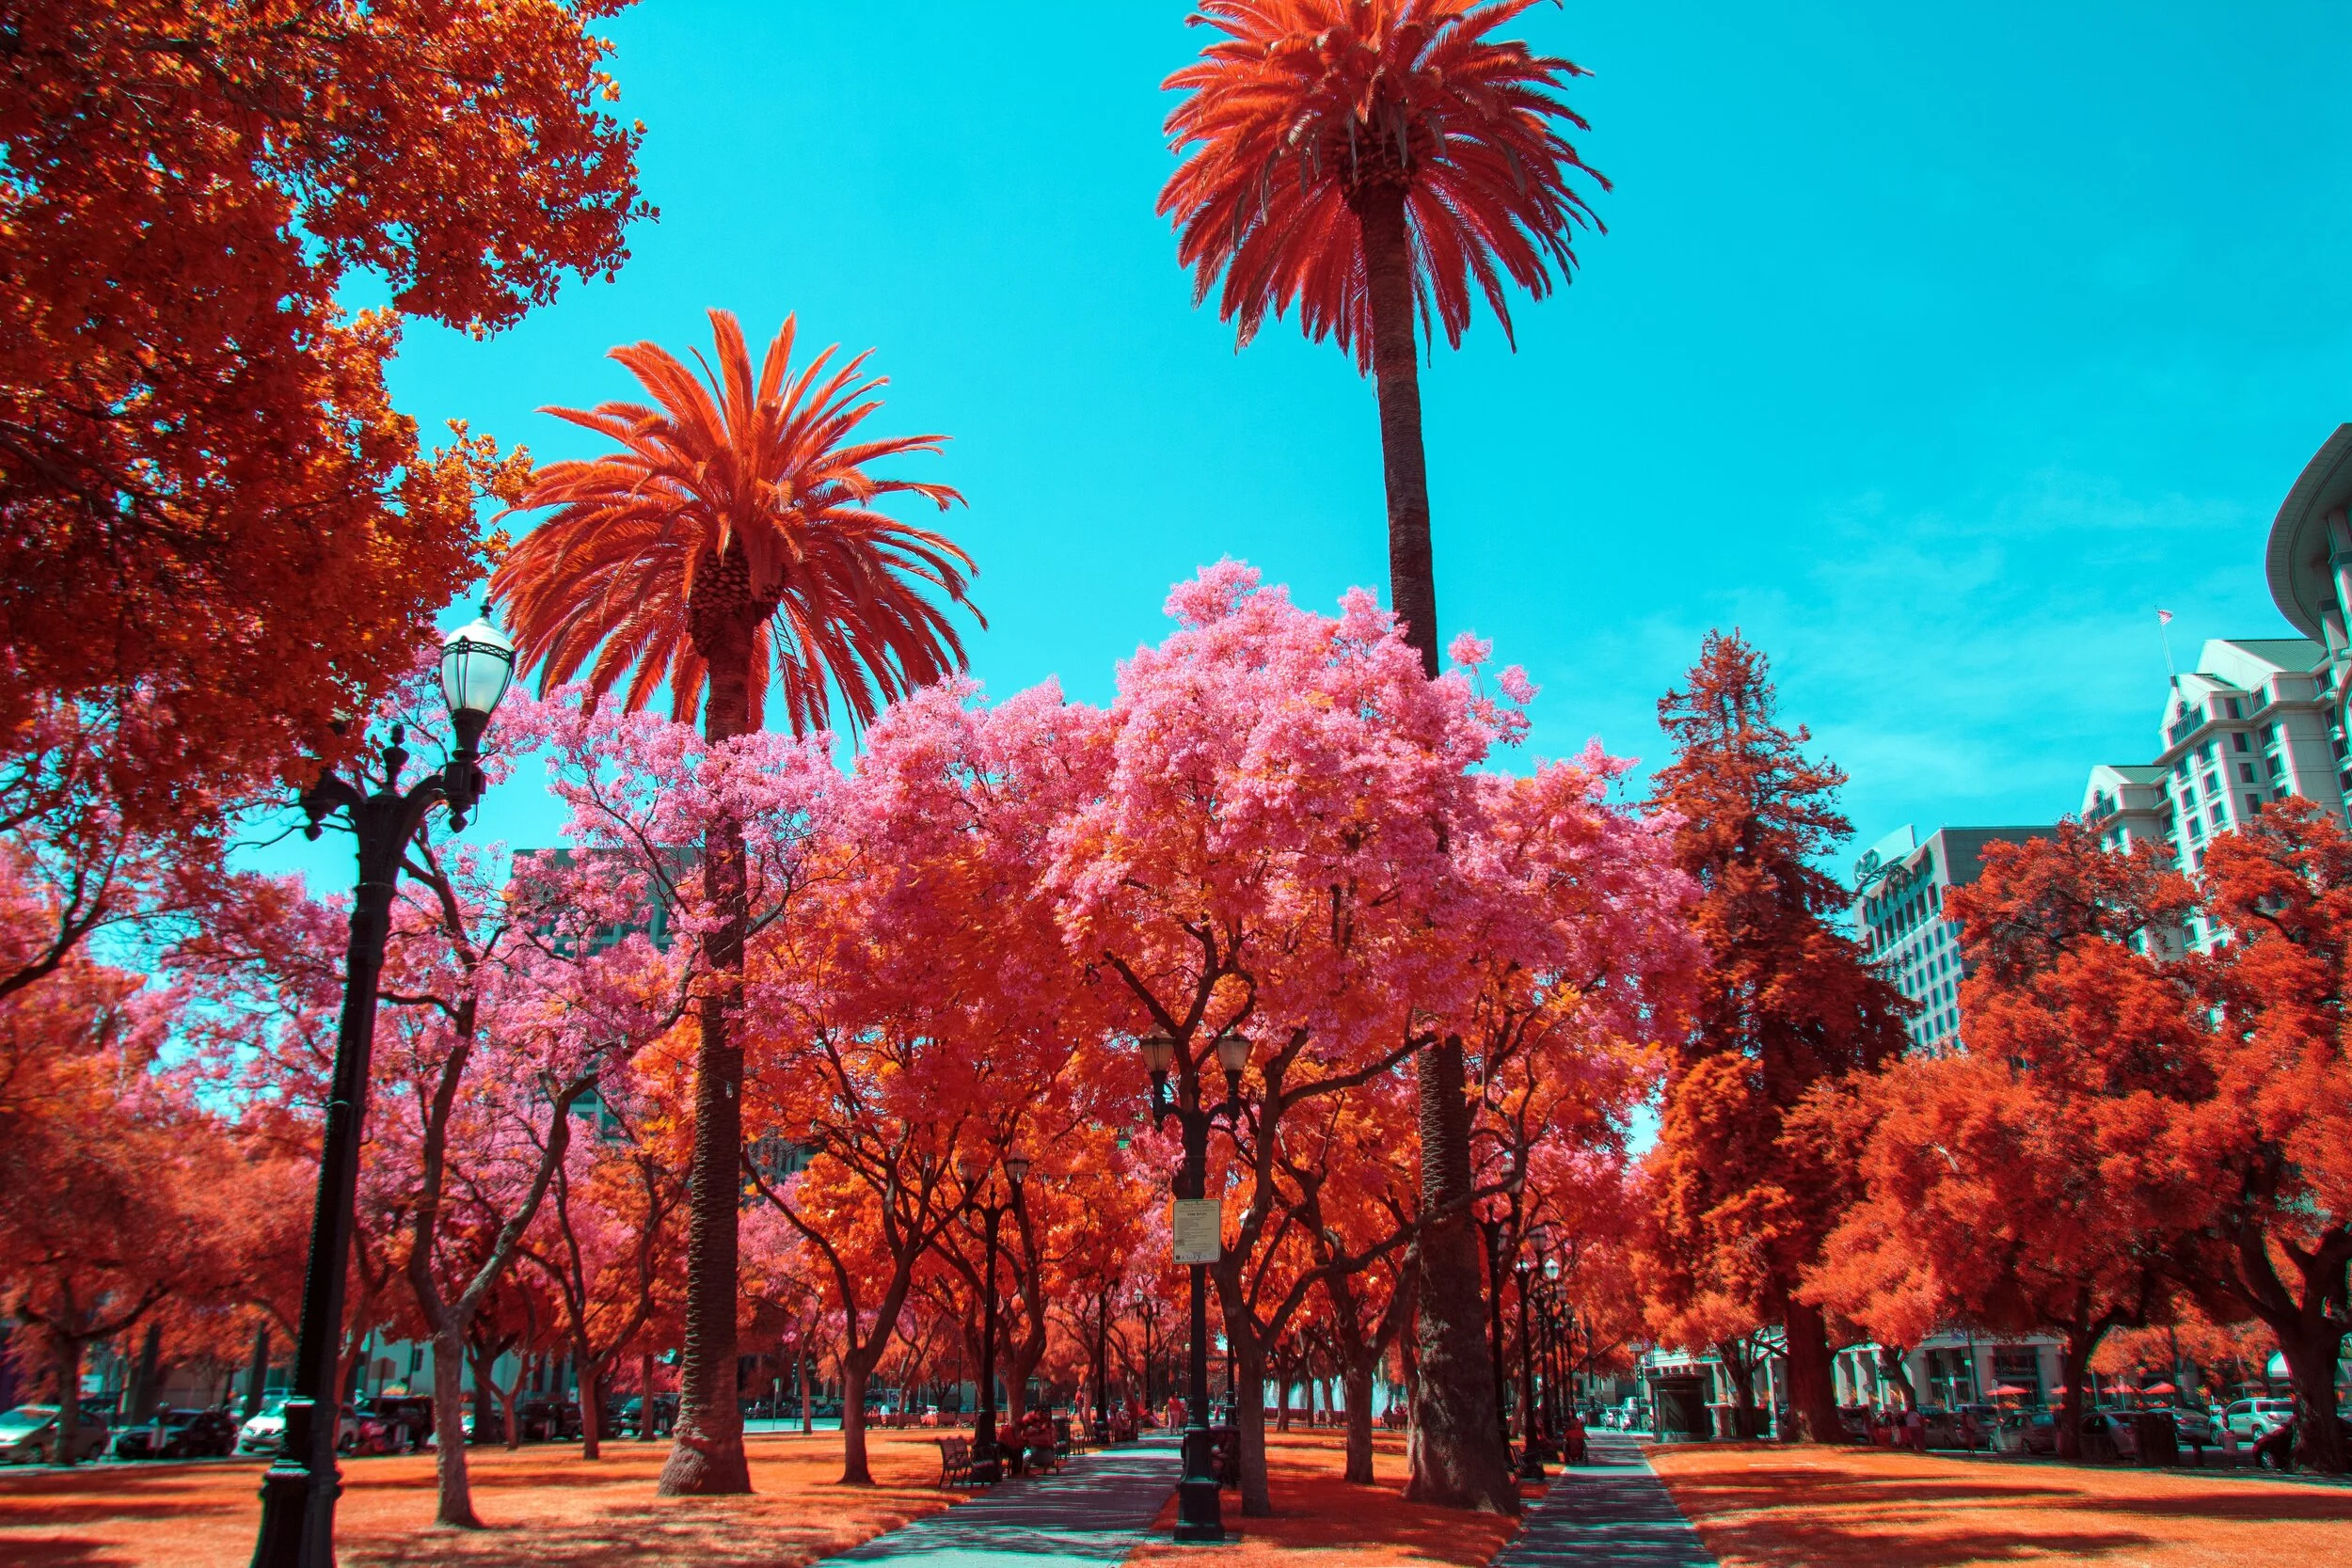
Keep in mind that different infrared film stocks will yield different color casts. It is important to check out sample images of each film before ultimately deciding which roll to buy! Color Infrared film will typically turn green plants bright red / pink. Brighter greens can also turn white if the conditions are right. Bright skies can also turn very dark.
For portraits shot outside, infrared film can highlight veins, freckles, blemishes, while making eyes darker. Sunglasses will even be see-through.
Grass, leaves, plants, trees reflect infrared light in slightly different ways which will result in different shades of red/pink/white. The greener the plant is, the whiter the color rendering will be. The recommended Tiffen Yellow 12 filter will render a wider spectrum of reds / pinks with your infrared film. Red filters will not capture the lighter pinks.
Sand and snow will be brighter and water will not display reflections.

Shooting Digital Infrared
For those that are interested in shooting infrared digitally, LifePixel converts standard digital cameras into digital cameras capable of capturing infrared light. This process is done by removing the camera’s hot mirror (glass plate found on top of the image sensor) and replacing it with an IR-specific glass filter. You can either send in your digital camera or purchase a new and converted one from their site.
If you enjoyed this, feel free to check out our Artist Interview Series and YouTube!